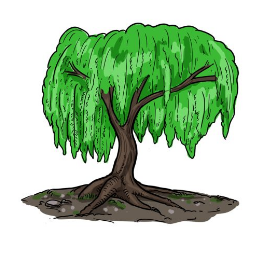
Draw a willow tree
Draw a Willow Tree in Only 6 Simple Tasks! There are a great many sorts of trees in nature. In addition to the fact that they are fascinating to check out and improve the scene, they can likewise be valuable for the vast majority of different things. Among many trees, the willow is the number one of many. This tree has an exceptionally particular appearance and will greatly expand to a nursery, yard, or scene. Of course, it likewise frequently shows up in different show-stoppers and paintings, making it famous among individuals to figure out how to draw a tree. You may also learn many things cartoon drawing, scary drawing, cat drawing cartoon drawing, cute drawing, flower drawing, cute drawing, puppy drawing, and dog drawing.
This can be interesting because the very thing that makes willow so exquisite, its appearance, can be hard to pull off. Consequently, you have come to the perfect location if you want to know how to make it happen! In this aide, we’ll walk you through six stages, showing you how fun and simple it may be, assuming you know what to do. We’ll likewise take a gander at a couple of ways to add your thoughts and changes to the plan. So we should get everything rolling and perceive how it’s finished! The most effective method to draw a willow
Instructions to draw a willow – begin!
1 stage
The most effective method to draw a willow stage 1 When it boils down to the root, there are two central things. They will comprise the storage compartment and the front of the leaf, and we will begin from the first. The verdant willow cover is its most unmistakable component and would subsequently be a significant element of this plan. Simultaneously, it is essential to paint the storage compartment and branches accurately. The storage compartment and branches are more cluttered than they show up, as they are fairly wound and tangled. For the present, we will make it more straightforward with less difficult moves toward trading this trunk and its connected branches.
To do this, we will define a single boundary to start the diagram. Before drawing this sketch, you should attract an unpleasant form of the willow pencil. This is an extra step. However, it will assist you with keeping up with the right direction. This will likewise help the united trunk, the leaves, and how they are associated. So, seeing that, we can define the principal boundary. As displayed in our picture, we will define a boundary on the left half of the midsection. This bent line will be keener, bent internally. We also don’t want to make the line excessively smooth since we believe it should seem as though it has a bark surface. Then, we’ll be prepared to continue toward stage 2!
Stage 2: Add the second piece of the tree trunk.
Instructions to draw a willow, stage 2 In the initial step of the instructional exercise, we drew the initial segment of the storage compartment of this willow tree. The principal line is basic. Nevertheless, that is where items get more confused. The willow trunk is extremely particular: it has a meager body with bent branches. It looks pretty under the torn leaves; we will attempt to replicate that in the drawing. First, we will define a boundary on the right half of the mid-region. To see the reference in the picture, look at this as a smidgen to one side of the line you drew before.
You will likewise see that the storage compartment needs to have an enormous base since we will add a few roots there later. Here is a straight rising, then, at that point, a bend to one side.
We will add two slanting lines to one side of this, framing one Angular shape. To finish this step, we will utilize a couple of bent lines to make a huge Angular shape in the focal point of the upper mid-region. The lines will be arbitrarily embedded, and these will go later in the instructional exercise. We’re prepared for a three-step detachment here, so we’ll prepare for it when we’re.
Stage 3: Add the layout of the leaves.
Instructions to draw a willow, stage 3 We’ll return to the log later in the instructional exercise; however, we’ll let it be and zero in on the covering for now. In this step of drawing the willow tree, we need to zero in on the elements of the crown. This covering will start and end around the middle place of the storage compartment, and the foundation of this layout is marginally unique about the top. The highest point of the vault is level.
However, the line still needs to be corrected. Then again, the lower part of the arch will have numerous little flimsy areas hanging out. In any case, a similar harsh line will be drawn at the highest point of the vault. By attracting these parts along these lines, you will make the presence of deciduous leaves, as in a genuine willow tree. The sides of the ashen crown ought to be far outside. A willow tree is an umbrella with a branchy top; we will show that in our image. It could look strange now. However, we’ll add a couple of additional branches as we come. Here, assuming your drawing is 1